Using Hasura Cloud with a Digital Ocean Postgres database
Table of contents
- Introduction
- Step 0: Sign up or log in to Hasura Cloud
- Step 1: Create a Hasura Cloud project
- Step 2: Create a Postgres DB on Digital Ocean (skip if you have an existing DB)
- Step 3: Allow connections to your DB from Hasura Cloud
- Step 4: Get the database connection URL
- Step 5: Finish creating the Hasura Cloud project
- Step 6: Launch Hasura console
- Next steps
Introduction
This guide explains how to connect a new or existing Digital Ocean Postgres database to a Hasura Cloud project.
Step 0: Sign up or log in to Hasura Cloud
Navigate to Hasura Cloud and sign up or log in.
Step 1: Create a Hasura Cloud project
On the Hasura Cloud dashboard, create a new project:
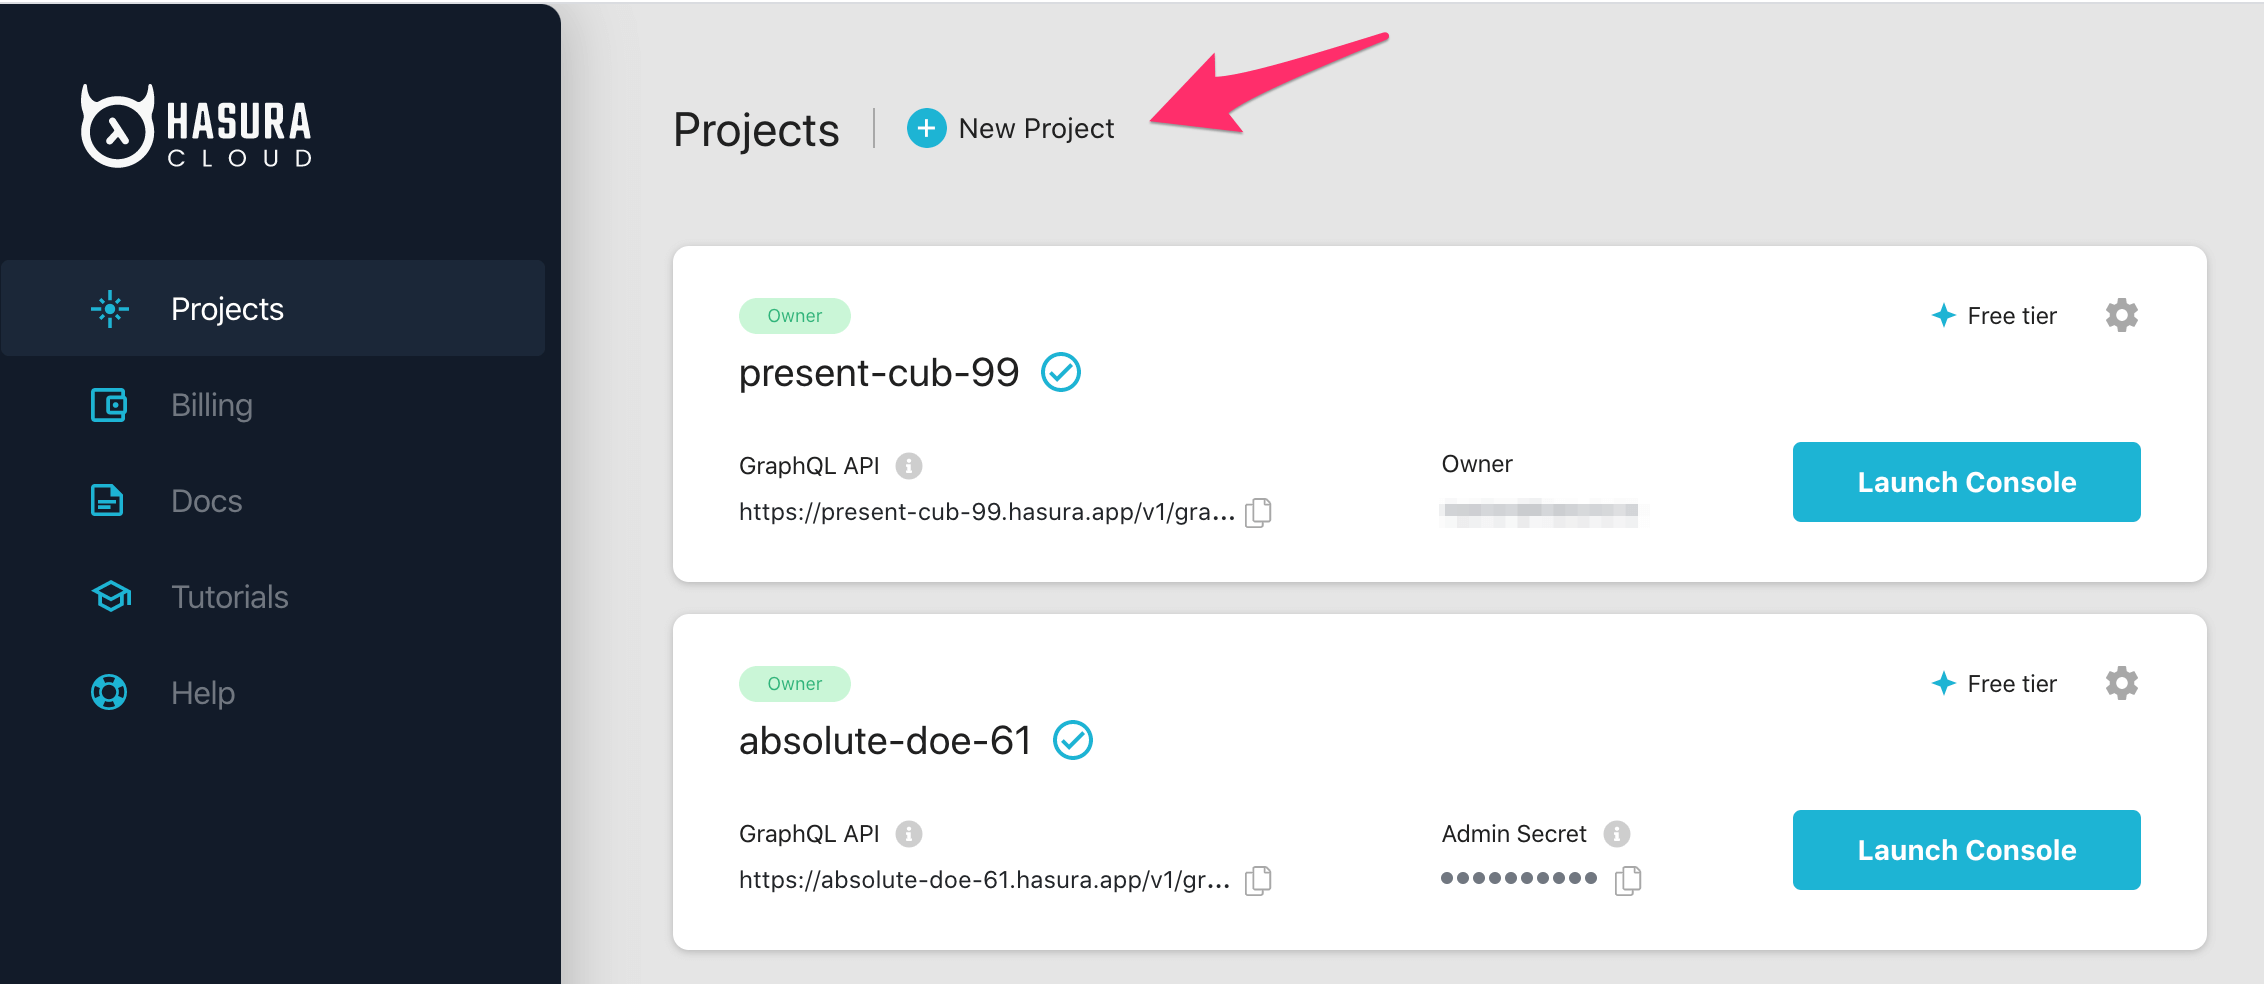
You will get prompted for a Postgres Database URL. We will create this in the next step and then come back here.
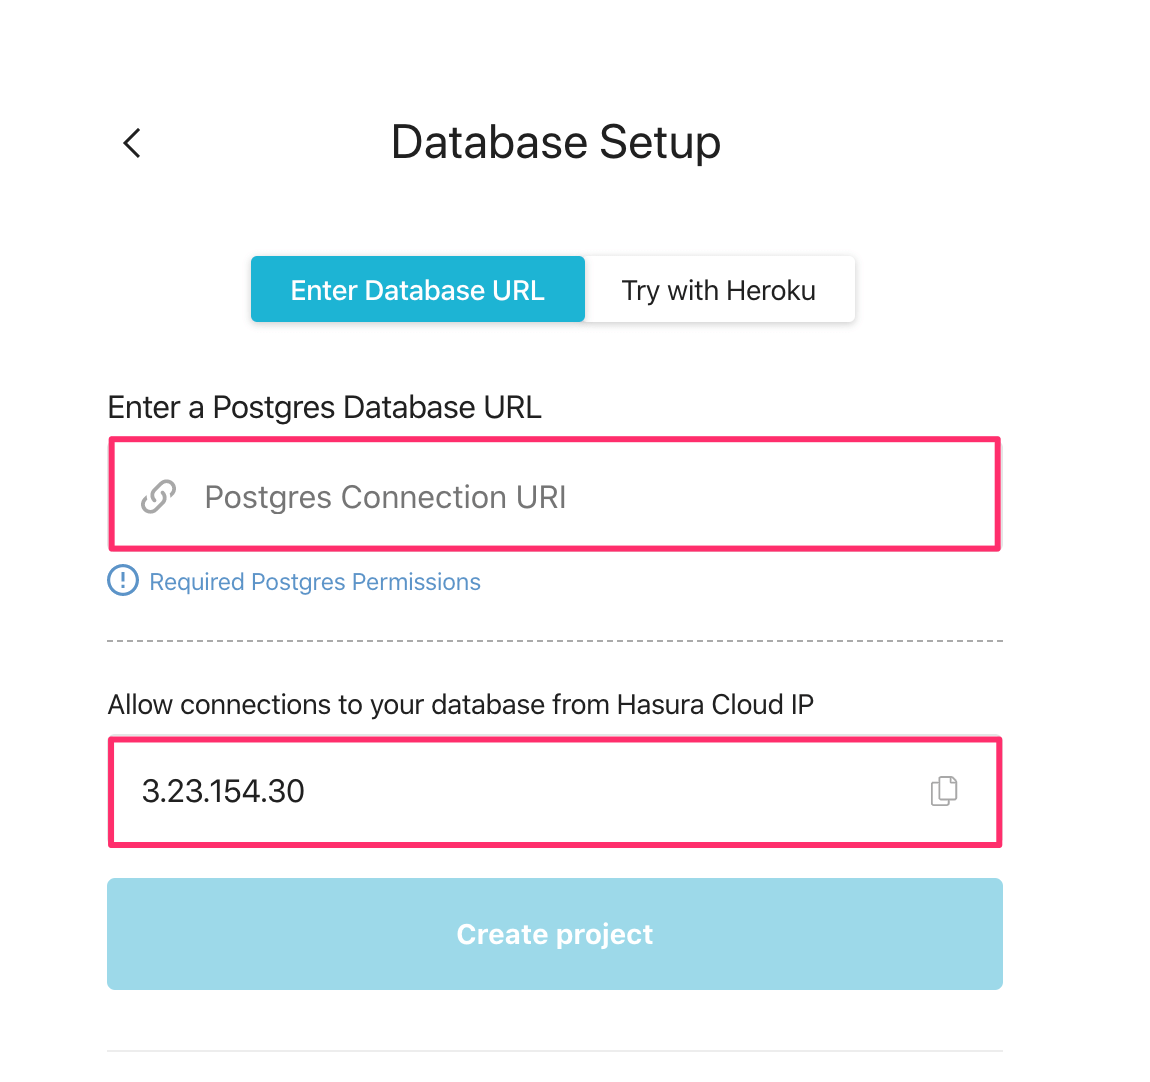
Also, copy the Hasura Cloud IP for later.
Step 2: Create a Postgres DB on Digital Ocean (skip if you have an existing DB)
Log into Digital Ocean.
On the top right, click the Create button. Then click on Databases:
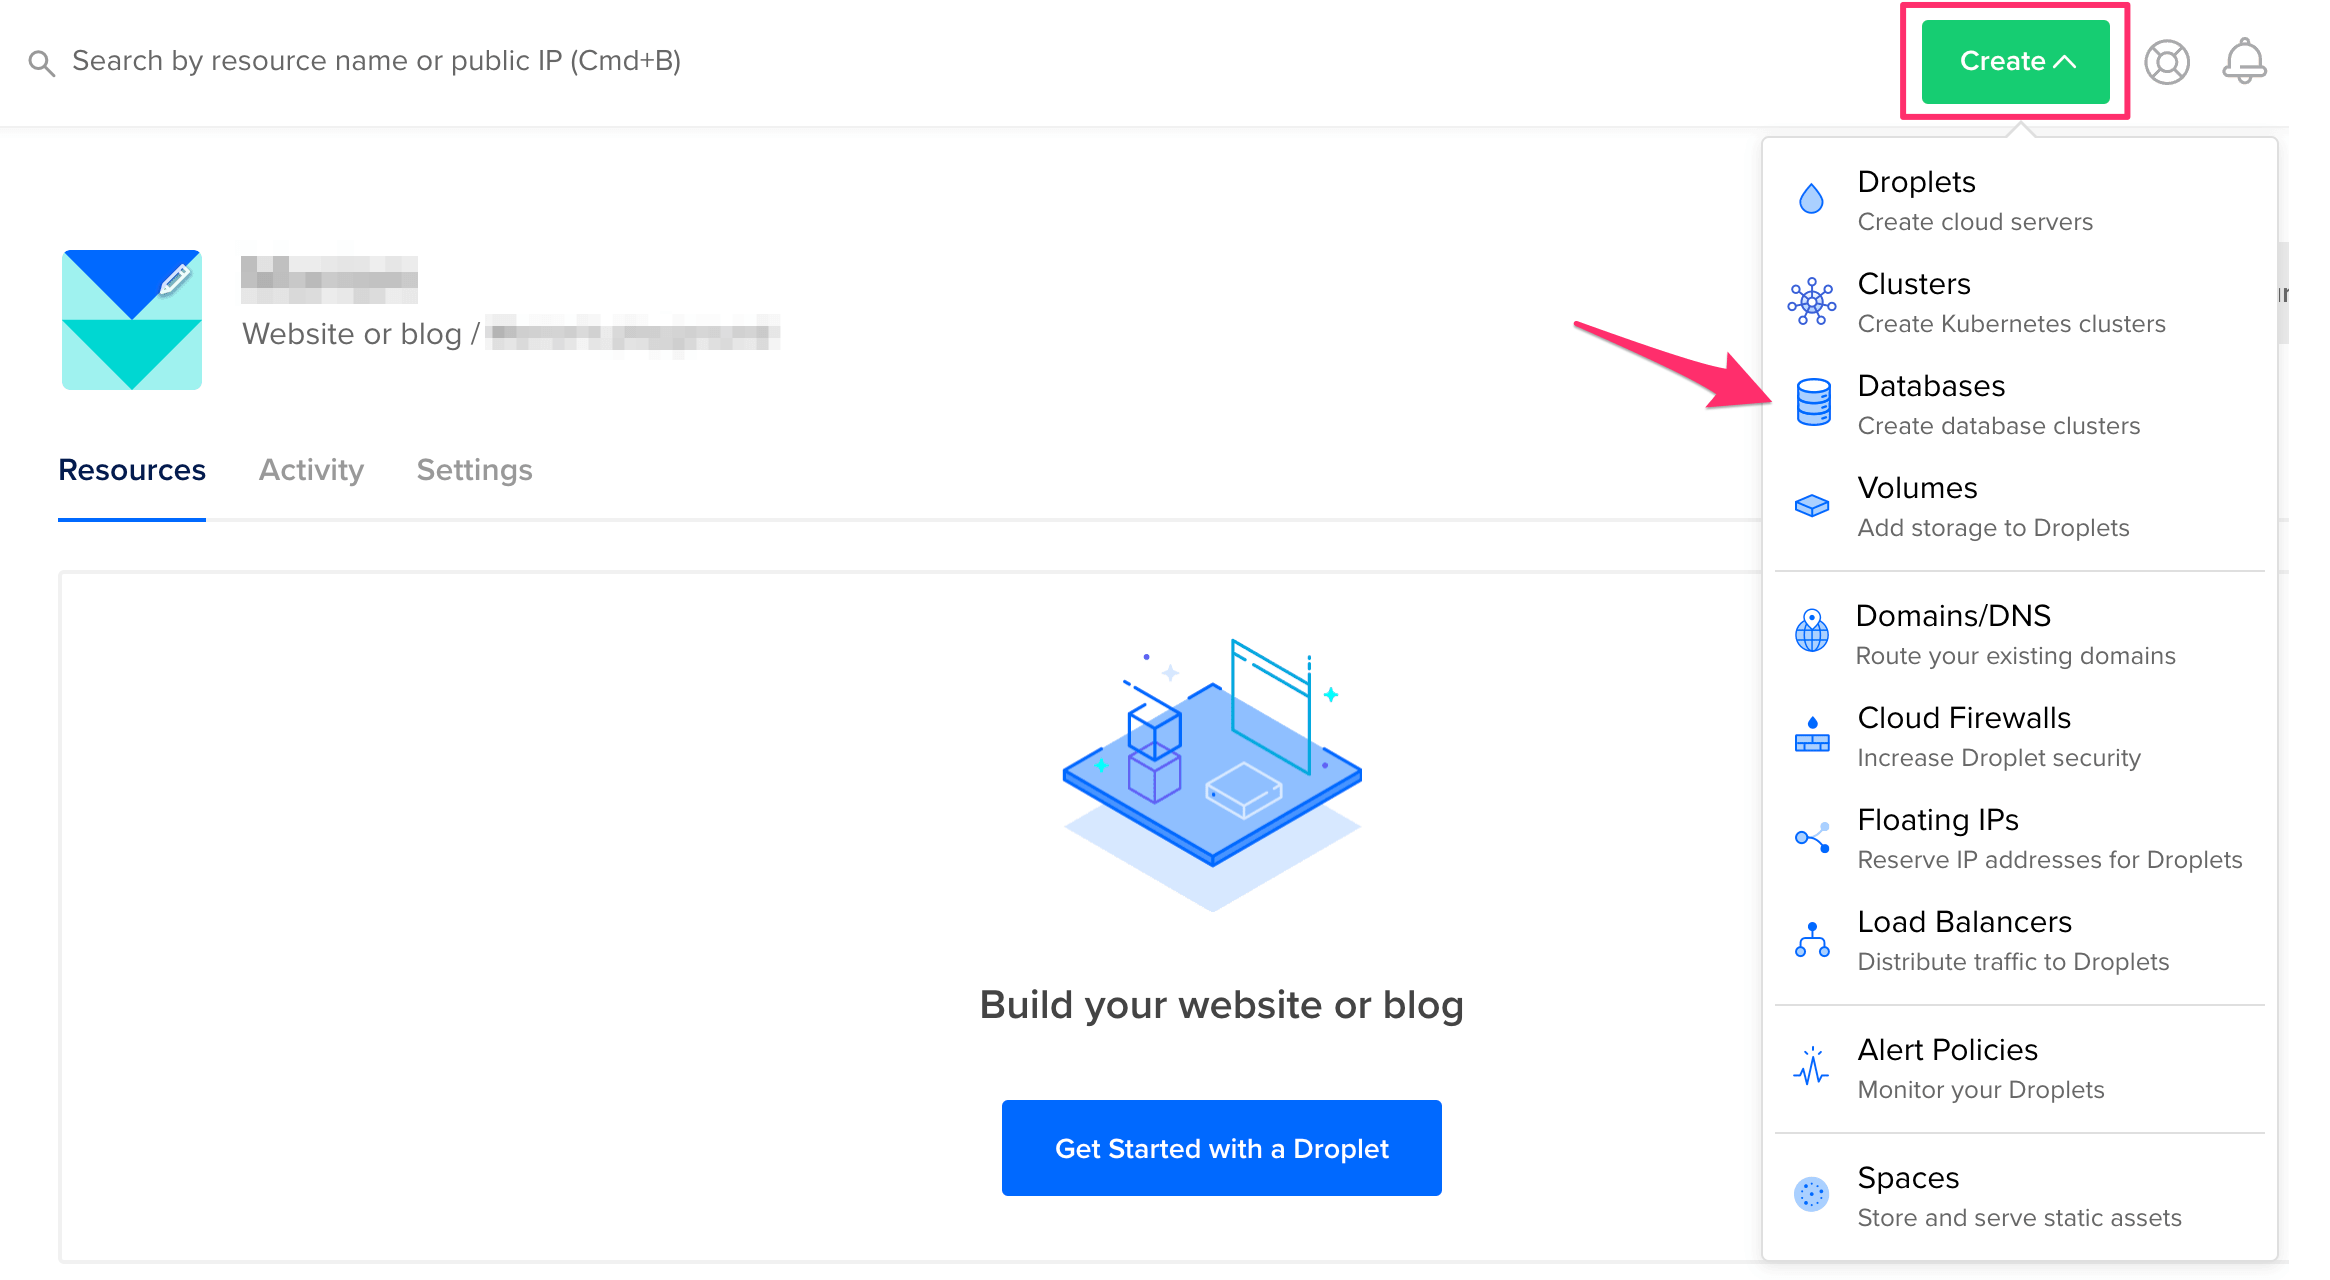
Scroll down and choose a Cluster configuration, as well as a Datacenter based on your requirements.
Scroll to the bottom and choose a unique database cluster name. Also, select a project the new database will be associated with.
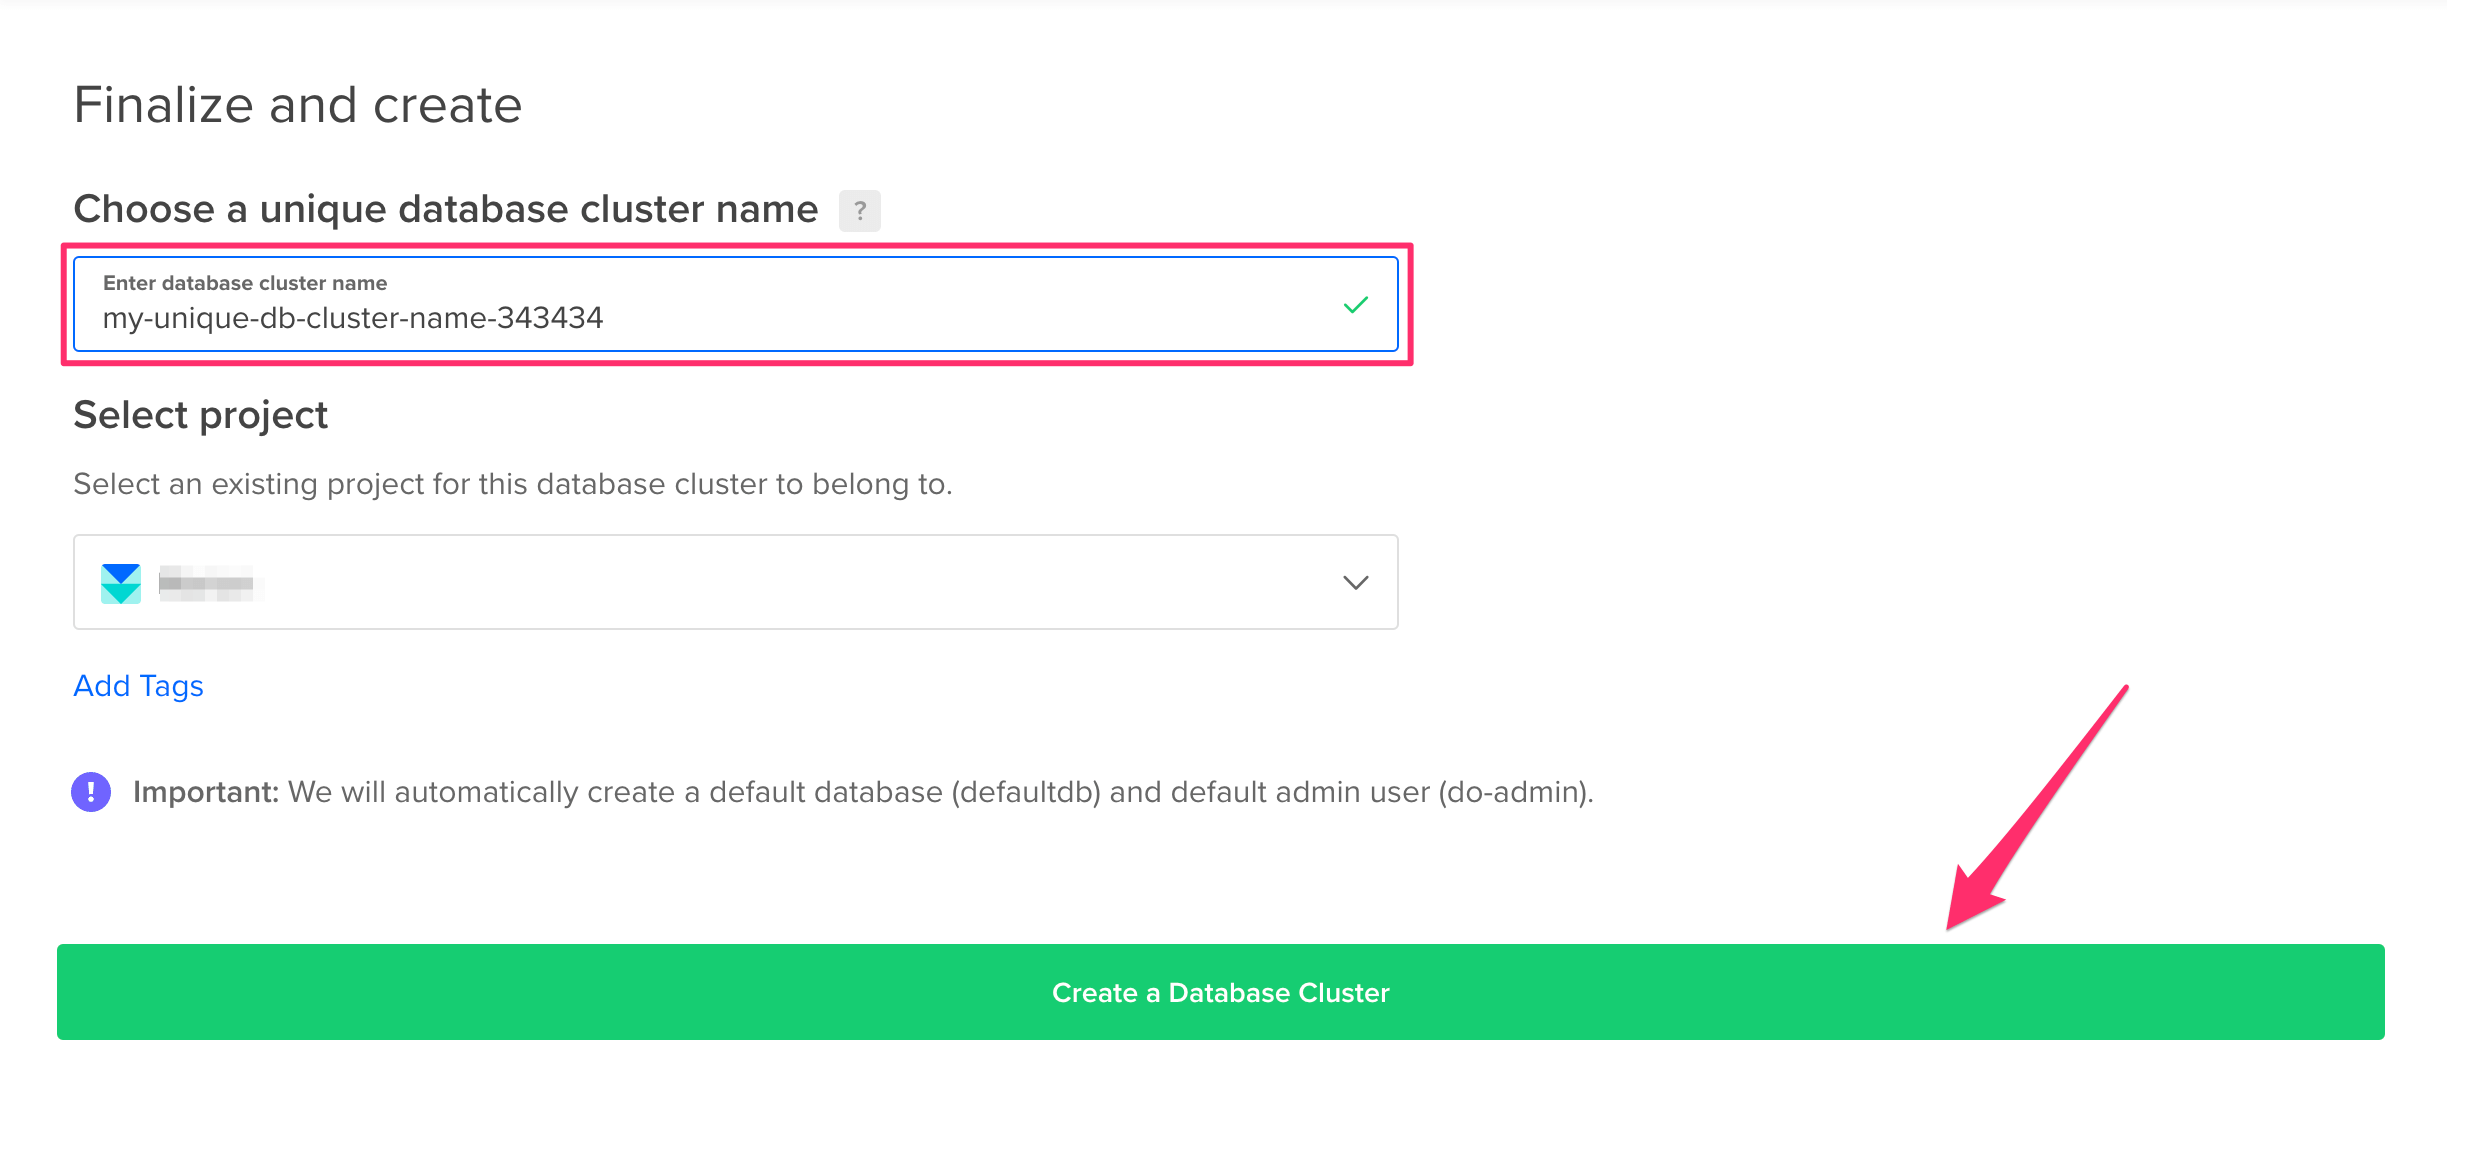
Then click Create a Database Cluster.
Step 3: Allow connections to your DB from Hasura Cloud
Navigate to the database cluster’s Overview page:

Scroll down to Trusted sources and click the Edit button:

Enter the Hasura Cloud IP we have optained from step 1.

Then click Save.
Note
If you’re using a database user other than the default one, make sure to give it the right Postgres permissions.
Step 4: Get the database connection URL
The structure of the database connection URL looks as follows:
postgresql://<user-name>:<password>@<public-ip>:<postgres-port>/<db>
To get it, navigate to the database cluster’s Overview page:

Scroll down to Connection details. Select Public network on the left and Connection string on the right.
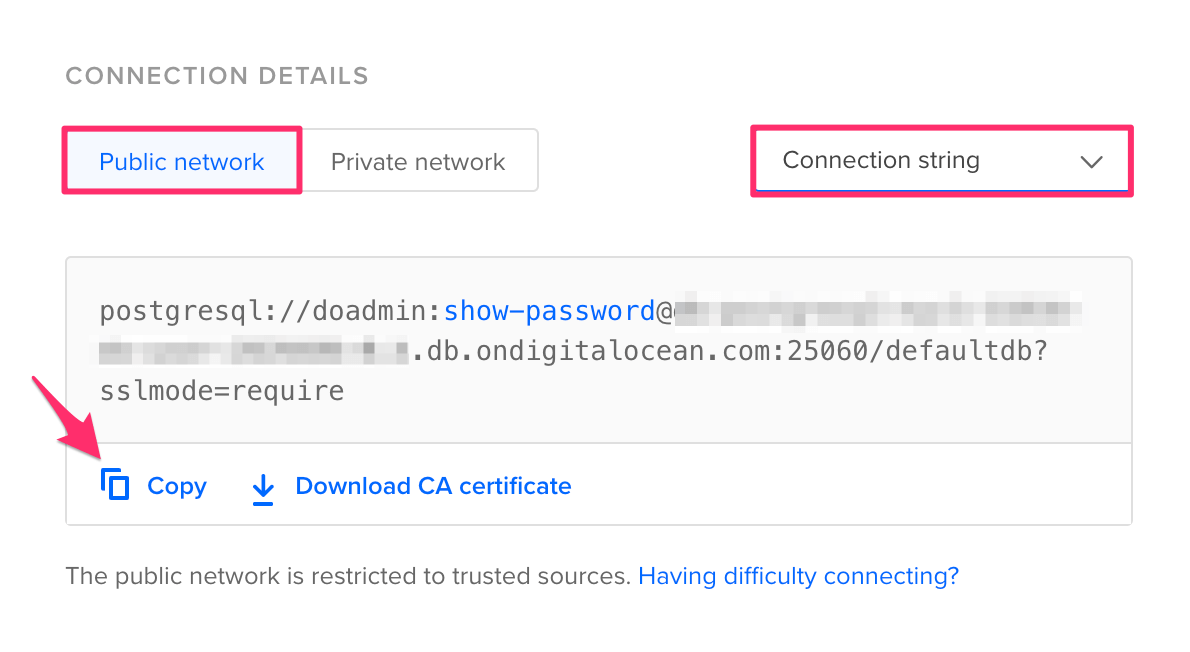
Then click the Copy button for the next step.
Step 5: Finish creating the Hasura Cloud project
Back on the Hasura Cloud dashboard, enter the database URL that we retrieved in step 4:
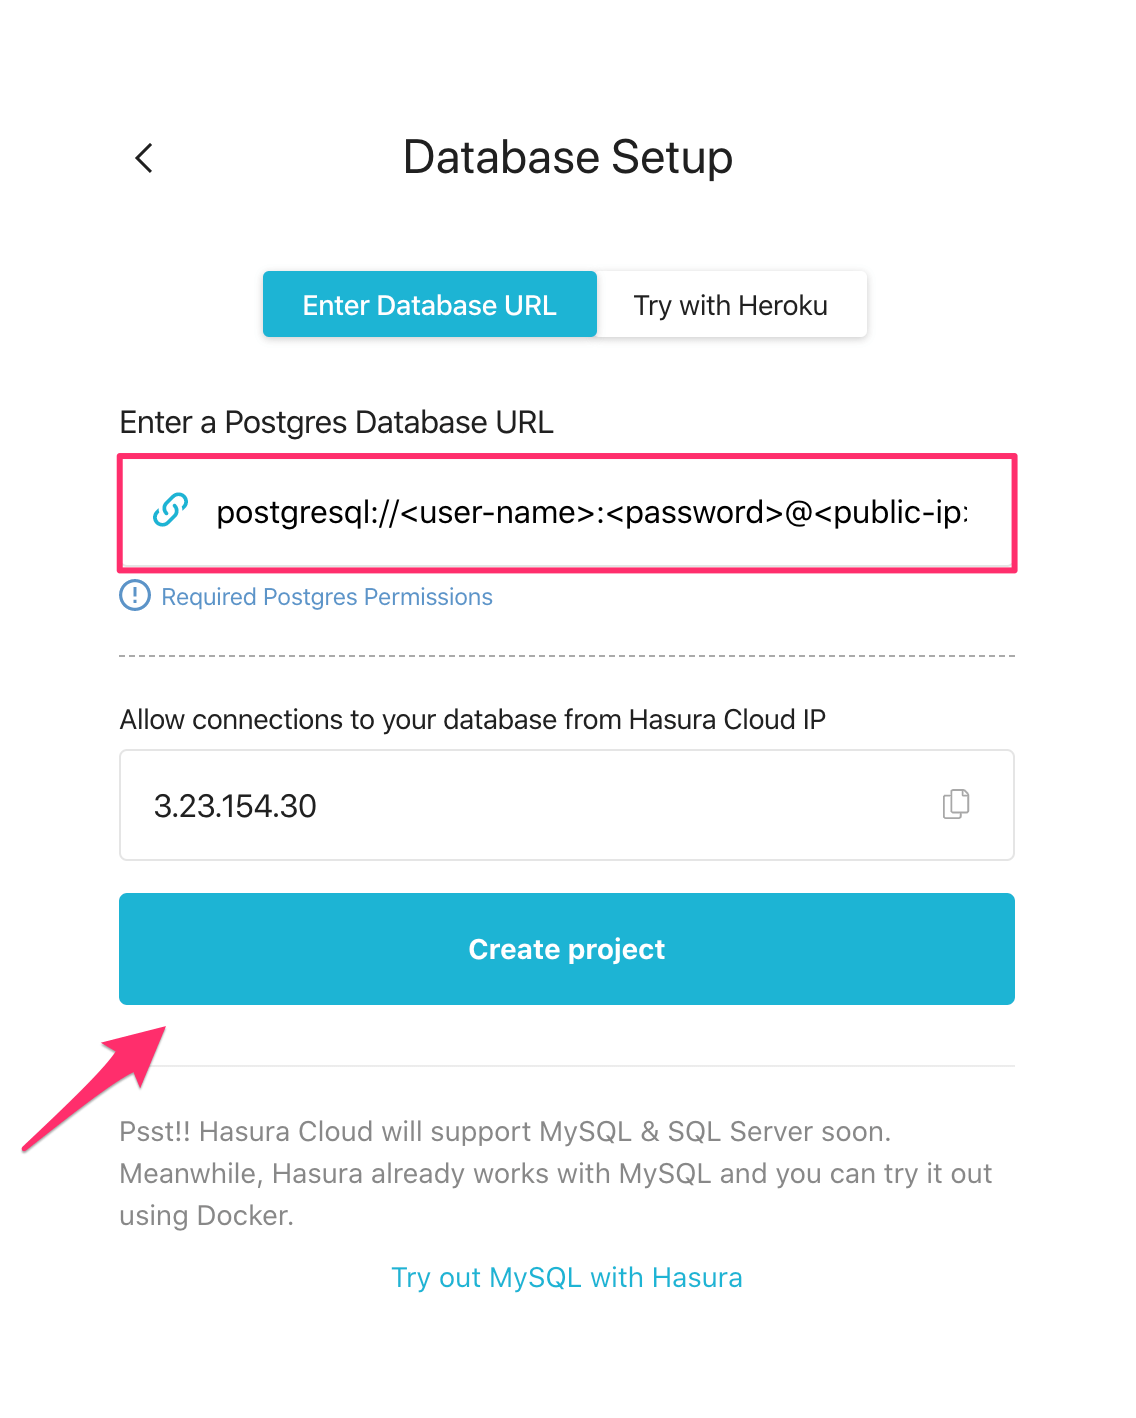
Then click Create project.
Step 6: Launch Hasura console
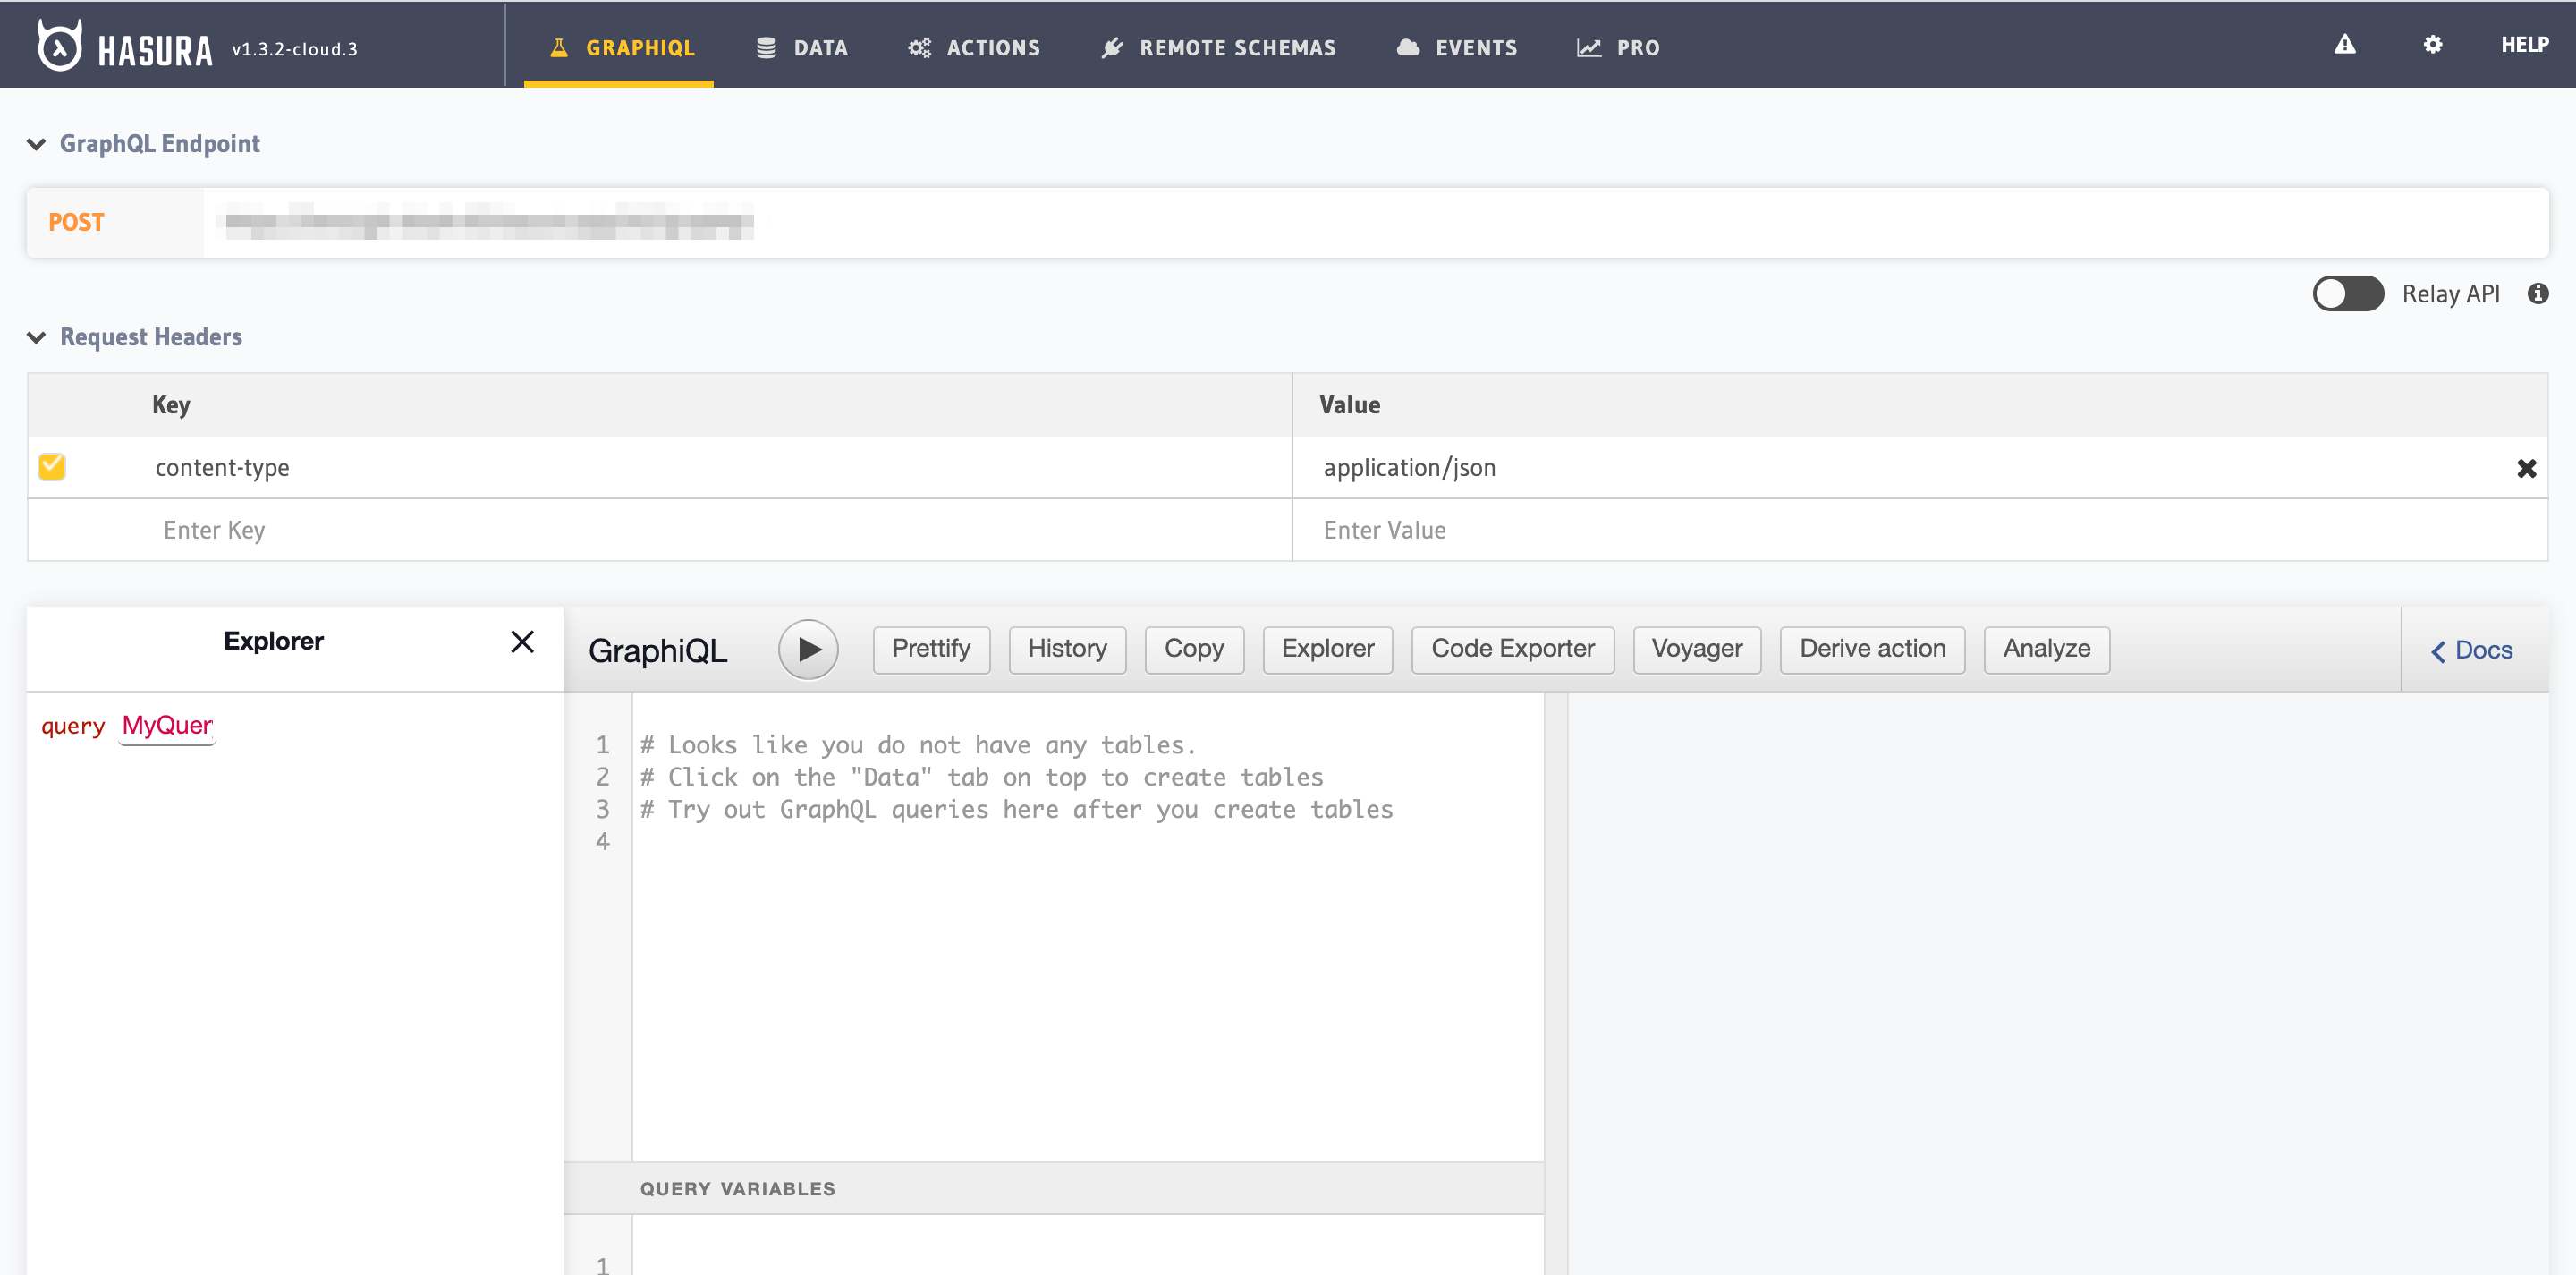
After the project is initialized successfully, click on Launch console:

Voilà. You are ready to start developing.
Next steps
You can check out our 30-Minute Hasura Basics Course and other GraphQL & Hasura Courses for a more detailed introduction to Hasura.
You can also click the gear icon to manage your Hasura Cloud project. (e.g. add collaborators, env vars or custom domains) and add an admin secret to make sure that your GraphQL endpoint and the Hasura console are not publicly accessible.

